今回はViewを重ねて表示できる「ZStack」について解説します。
SwiftUIでViewを重ねて表示する方法【ZStackの使い方】
まずはイニシャライザーです。
ZStack(alignment: Alignment, content: () -> _)alignment: Alignment は上に重なるViewが従うべきアラインメントを指定します。左上(.topLeading)・右上(.topTrailing)・左下(.bottomLeading)・右下(.bottomTrailing)を指定することができるのが HStack・VStack と異なるところです。
content: () -> _ には重ねて表示するViewを定義します。下記のように外側に {} を置いて定義するのが一般的です。
ZStack(alignment: .leading) {
    Rectangle()
    Rectangle()
}
シンプルな例(中央寄せ)
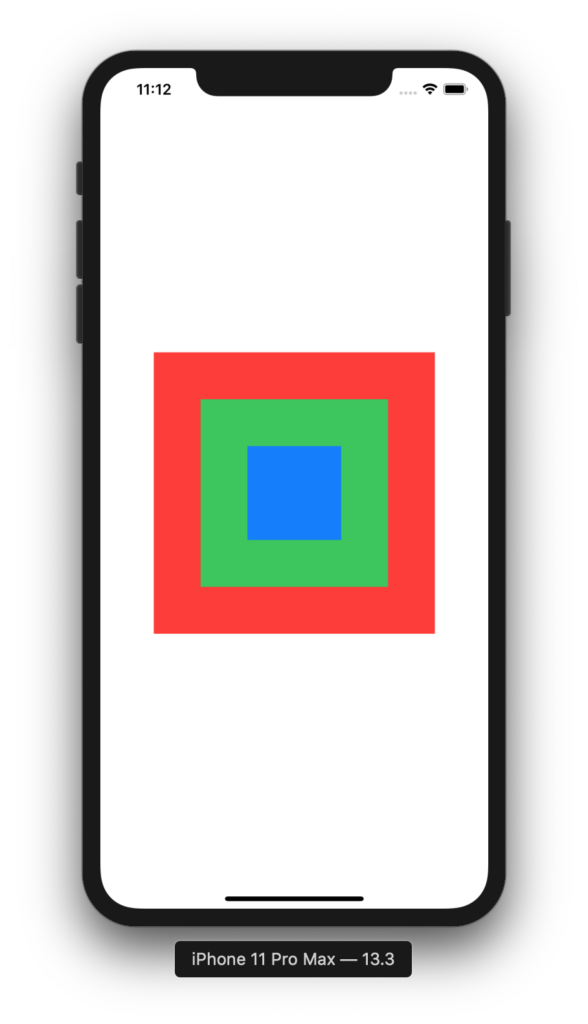
Viewを中央寄せに重ねる例です。わかりやすいように色とサイズを変えています。
ZStack {
    Rectangle().foregroundColor(.red).frame(width: 300, height: 300)
    Rectangle().foregroundColor(.green).frame(width: 200, height: 200)
    Rectangle().foregroundColor(.blue).frame(width: 100, height: 100)
}
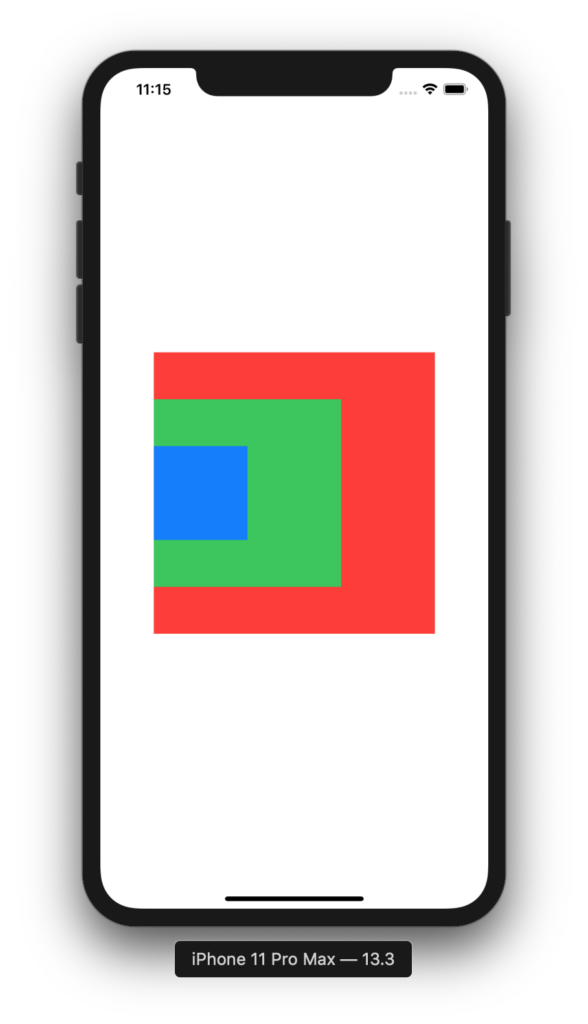
左寄せに重ねる
ZStack(alignment: .leading) {
    Rectangle().foregroundColor(.red).frame(width: 300, height: 300)
    Rectangle().foregroundColor(.green).frame(width: 200, height: 200)
    Rectangle().foregroundColor(.blue).frame(width: 100, height: 100)
}
右下寄せに重ねる
ZStack(alignment: .bottomTrailing) {
    Rectangle().foregroundColor(.red).frame(width: 300, height: 300)
    Rectangle().foregroundColor(.green).frame(width: 200, height: 200)
    Rectangle().foregroundColor(.blue).frame(width: 100, height: 100)
}
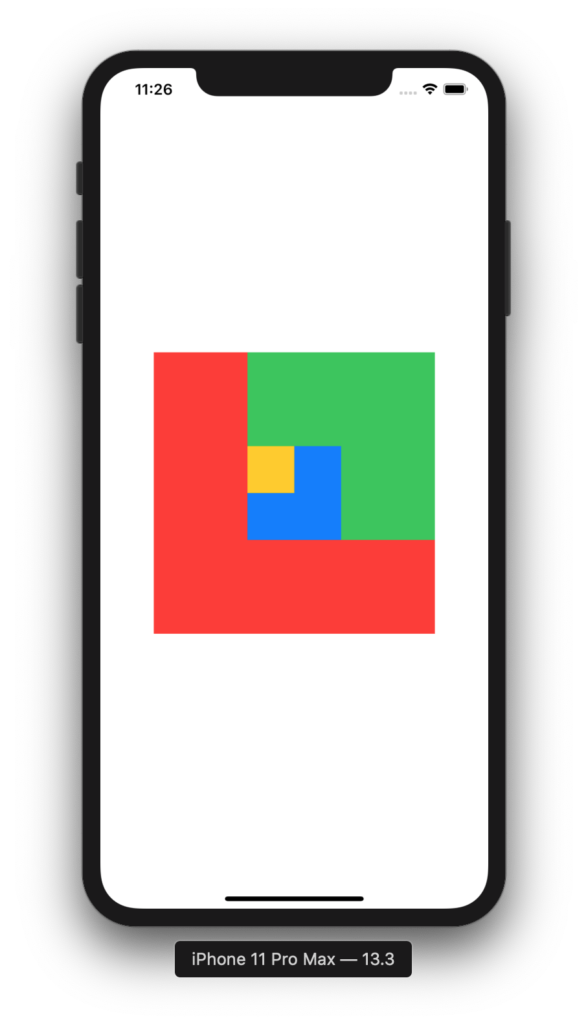
ZStackの入れ子
ZStack(alignment: .topTrailing) {
    Rectangle().foregroundColor(.red).frame(width: 300, height: 300)
    ZStack(alignment: .bottomLeading) {
        Rectangle().foregroundColor(.green).frame(width: 200, height: 200)
        ZStack(alignment: .topLeading) {
            Rectangle().foregroundColor(.blue).frame(width: 100, height: 100)
            Rectangle().foregroundColor(.yellow).frame(width: 50, height: 50)
        }
    }
}
以上


コメントを残す