今回は、任意のView要素から吹き出しを表示する方法を紹介します。
ただし、表題にある通り、この機能は iPad でしか動作しません。iPhone でもビルドは通りますが意図した挙動はしませんのでご注意ください。
【SwiftUI】Popover(吹き出し)を表示する方法【※iPad専用】
イニシャライザー
イニシャライザーは4種類ありますが、主に使用するのは以下の2通りです。
popover(isPresented: Binding<Bool>, content: () -> View)
popover(isPresented: Binding<Bool>, attachmentAnchor: PopoverAttachmentAnchor, arrowEdge: Edge, content: () -> View)
isPresented: Binding<Bool> には @State or @Publish の Bool 変数を紐付けます。
content: () -> View は吹き出しの View 要素です。Text や Image など自由にレイアウトできます。
attachmentAnchor: PopoverAttachmentAnchor は
arrowEdge: Edge は吹き出しのエッジ(飛び出た部分)の方向を指定します。
attachmentAnchor と arrowEdge は分かりづらいので具体例で確認していきましょう。
arrowEdge: Edge
先に、arrowEdge についてですが、こちらは吹き出しのエッジ方向を以下の4方向で指定します。
- top:上向き
- bottom:下向き
- leading:左向き
- trailing:右向き
指定した方向によって自動的に位置も調整してくれます。
例えば、表示元(Text)の左側に右方向のエッジで表示するには以下のようにします。
.popover(isPresented: $isShowPopover, arrowEdge: .trailing) {
    Text("吹き出しです")
}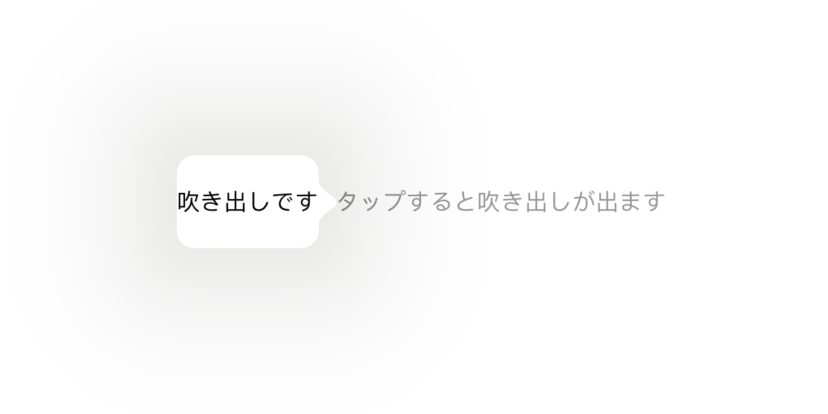
いい感じに左側から表示されていますね。
attachmentAnchor: PopoverAttachmentAnchor
続いて、attachmentAnchor についてです。こちらは吹き出し位置の調整を行えます。
指定の仕方には2通りあります。
- .point
- .rect
.point
吹き出しの起点を以下の8方向から指定します。
- top:上
- bottom:下
- leading:左
- trailing:右
- topLeading:左上
- topTrailing:右上
- bottomLeading:左下
- bottomTrailing:右下
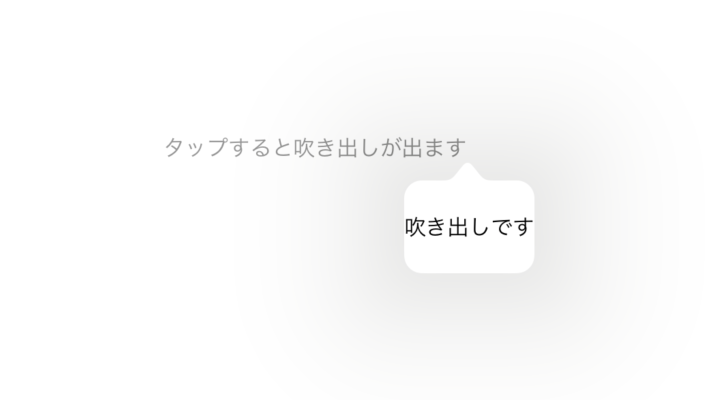
下記は表示元(テキスト)の右下に上方向の吹き出しを表示する例です。
.popover(isPresented: $isShowPopover, attachmentAnchor: .point(.bottomTrailing), arrowEdge: .top) {
    Text("吹き出しです")
}
.rect
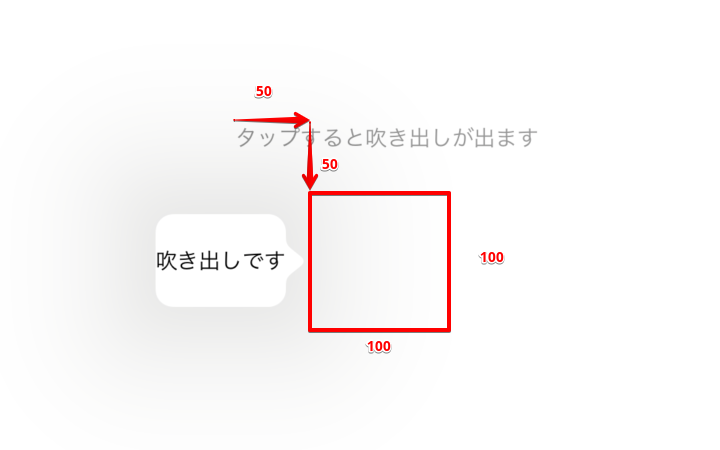
.rect は表示元の左上を起点とした X/Y のオフセットと、そのオフセットした位置を起点とした矩形のサイズを指定します。表示元とは全く別の位置に仮定した矩形に対して吹き出しを表示することになります。
非常に分かりづらいので実際の画面でイメージしてもらいたいと思います。
以下は X:50 Y:50 の位置にある 100×100 の矩形の左側に右向きの吹き出しを表示する例です。
.popover(isPresented: $isShowPopover, attachmentAnchor: .rect(.rect(CGRect(x: 50, y: 50, width: 100, height: 100))), arrowEdge: .trailing) {
    Text("吹き出しです")
}
使いどころが難しいですが、上記のように柔軟に表示位置を調整することができます。
以上。



コメントを残す