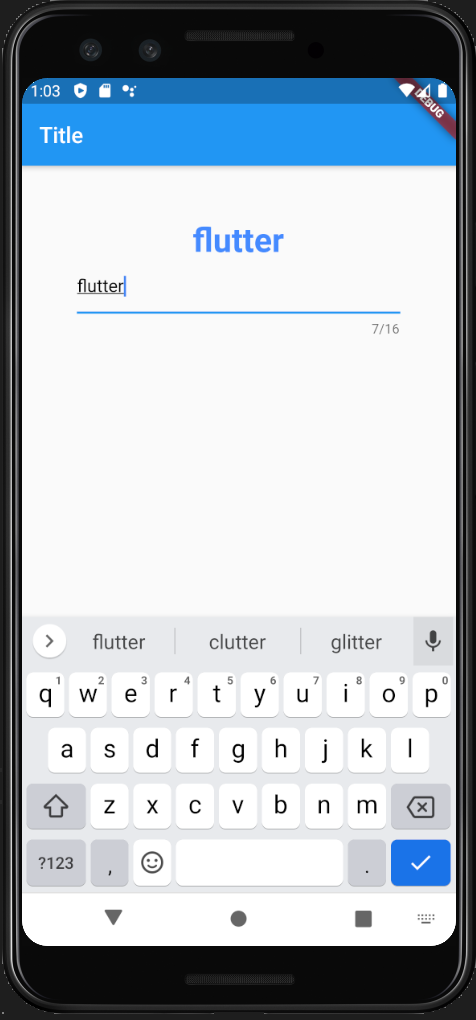
今回はテキスト入力できる Widget である TextField について学習します。
最大文字数、最大行数、パスワード入力などについて触れていきます。
また、サンプルプログラムでは、入力したテキストを Text に反映することも行っています。
【Flutter入門】テキスト入力するWidget【TextField】
TextField の引数を見ていきます。
maxLength
TextField(maxLength: 16)入力最大文字数を設定します。
maxLengthEnforced
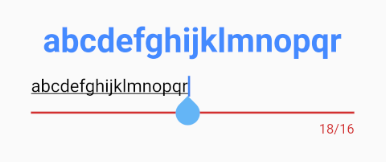
TextField(maxLengthEnforced: true)true を指定した場合、maxLength で設定した文字数を超えて入力することが出来なくなります。false にすると入力は出来ますが、以下のキャプチャのように下線が赤く表示されます。
style
TextField(style: TextStyle(color: Color.red)入力文字列の表示スタイルを指定します。
TextStyle については以下の記事て詳しく解説していますのでご覧ください。
maxLines・minLines
TextField(maxLines: 4)
TextField(minLines: 2)入力可能な最大行数・最小行数を指定します。行数を無制限にしたい場合は null を指定します。
onChanged
void _handleTextField(String text) {
    何か処理
}
・・・
TextField(onChanged: _handleTextField)
変更が加えられたタイミングで何か処理を行いたい場合にハンドリングする関数を指定します。
autofocus
TextField(autofocus: true)true を指定すると表示されたタイミングで入力フォーカスを当てておくことが出来ます。
obscureText
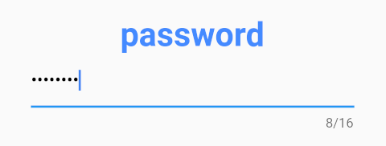
TextField(obscureText: true)パスワード入力等で●表示したい場合は true を指定します。
最後に、冒頭サンプルの全体ソースコードを紹介して終わります。
void main() {
  runApp(MyApp());
}

class MyApp extends StatelessWidget {
  @override
  Widget build(BuildContext context) {
    return MaterialApp(
      title: 'Test App',
      home: Scaffold(
        appBar: AppBar(
          title: Text('Title'),
        ),
        body: Center(
          child: TestPage(),
        ),
      ),
    );
  }
}

class TestPage extends StatefulWidget {
  @override
  _TestPageState createState() => _TestPageState();
}

class _TestPageState extends State<TestPage> {

  String _outputText = "";

  void _handleOutputText(String inputText) {
    setState(() {
      _outputText = inputText;
    });
  }

  Widget build(BuildContext context) {
    return Container(
      padding: const EdgeInsets.all(50),
      child: Column(
        children: <Widget>[
          Text(
            "$_outputText",
            style: TextStyle(
              color: Colors.blueAccent,
              fontSize: 30.0,
              fontWeight: FontWeight.bold,
            ),
          ),
          TextField(
            maxLength: 16,
            maxLengthEnforced: true,
            style: TextStyle(color: Colors.black),
            maxLines: 1,
            onChanged: _handleOutputText,
          ),
        ],
      ),
    );
  }
}
以上






コメントを残す