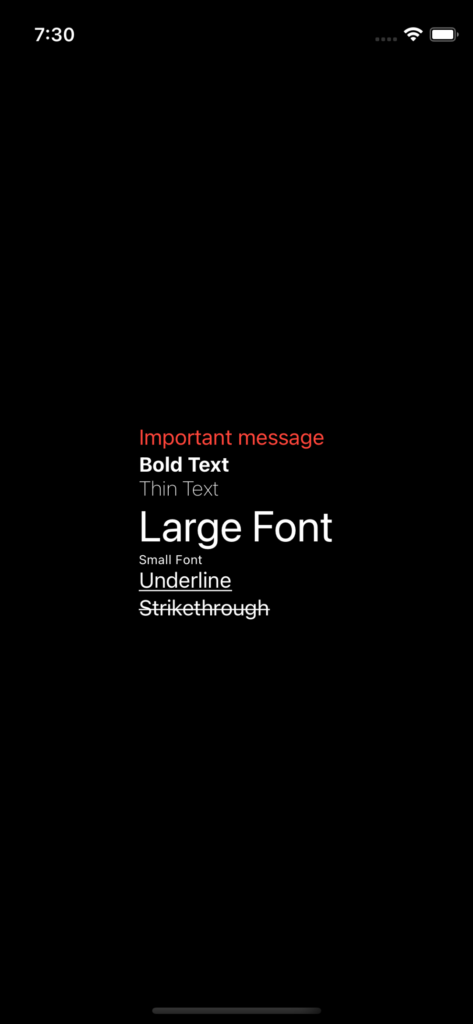
Text の文字列の中で、強調したい一部分だけ色・フォント・下線などを指定したい場合は AttributedString を利用します。
UIKit には元々 NSAttributedString というものがありましたが、それを SwiftUI で使えるようにした一種のAPIになります。
【SwiftUI 3.0】Text の一部だけ色やフォントを変える方法【AttributedString】
AttributedString 作成手順
先ずは AttributedString を作成
引数に対象の文字列を渡せば戻り値で AttributedString を取得できます。
let attrStr = AttributedString("This is Attributed String")Range で変更したい範囲を指定する
色やフォントを変更したい部分の文字列を Range で指定します。
if let range = attrStr.range(of: "Attributed") {
    str[range].foregroundColor = .red
}
上記の例だと、これで「Attributed」の部分だけ赤色になります。
少し複雑に装飾してみる
色、フォント、下線などの装飾を色々と付加してみましょう。
サンプルコード
struct ContentView: View {
    var body: some View {
        Text(getAttributedString())
            .padding()
    }

    func getAttributedString() -> AttributedString {
        var attrStr = AttributedString(
            """
            Important message
            Bold Text
            Thin Text
            Large Font
            Small Font
            Underline
            Strikethrough
            """
        )
        if let range = attrStr.range(of: "Important message") {
            attrStr[range].foregroundColor = .red
        }
        if let range = attrStr.range(of: "Bold Text") {
            attrStr[range].font = .system(size: 16, weight: .bold)
        }
        if let range = attrStr.range(of: "Thin Text") {
            attrStr[range].font = .system(size: 16, weight: .thin)
        }
        if let range = attrStr.range(of: "Large Font") {
            attrStr[range].font = .largeTitle
        }
        if let range = attrStr.range(of: "Small Font") {
            attrStr[range].font = .title3
        }
        if let range = attrStr.range(of: "Underline") {
            attrStr[range].underlineStyle = .single
        }
        if let range = attrStr.range(of: "Strikethrough") {
            attrStr[range].strikethroughStyle = .single
        }
        return attrStr
    }
}
表示結果

Text を連結する方法
実は Text を + で連結することでも同じことができます。
下記のコードは AttributedString を使用した場合と同じ表示結果となります。
struct ContentView: View {
    var body: some View {
        VStack {
            Text("Important message\r\n").foregroundColor(.red) +
            Text("Bold Text\r\n").font(.system(size: 16, weight: .bold)) +
            Text("Thin Text\r\n").font(.system(size: 16, weight: .thin)) +
            Text("Large Font\r\n").font(.largeTitle) +
            Text("Small Font\r\n").font(.system(size: 10)) +
            Text("Underline\r\n").underline() +
            Text("Strikethrough").strikethrough()
        }
    }
}
AttributedString を使うより Range を作ったりしない分わかりやすいですね。
ただ、比較的短い文字列を操作する場合はこれで良いかもしれませんが、長文を複雑にアレンジする場合は、長文中の修正しない部分も Text に抜き出して連結しなければなりませんので、状況に応じて使い分けると良いでしょう。


コメントを残す